Thursday, October 28, 2010

Building a single server Project Server 2010 with SQL Server for use as a development environment. Part 3

Run the SharePoint Products Configuration Wizard

Use the following procedure to install and configure the configuration database and the content database, and install the SharePoint Central Administration Web site.

To run the SharePoint Products Configuration Wizard

1.On the Welcome to SharePoint Products page, click Next.

01_sharepoint_2010_run_wizard.gif

2.In the dialog box that notifies you that some services might need to be restarted during configuration, click Yes.

03_sharepoint_2010_iisreset_warning

3.On the Connect to a server farm page, click Create a new server farm, and then click Next.

04_sharepoint_2010_server_farm

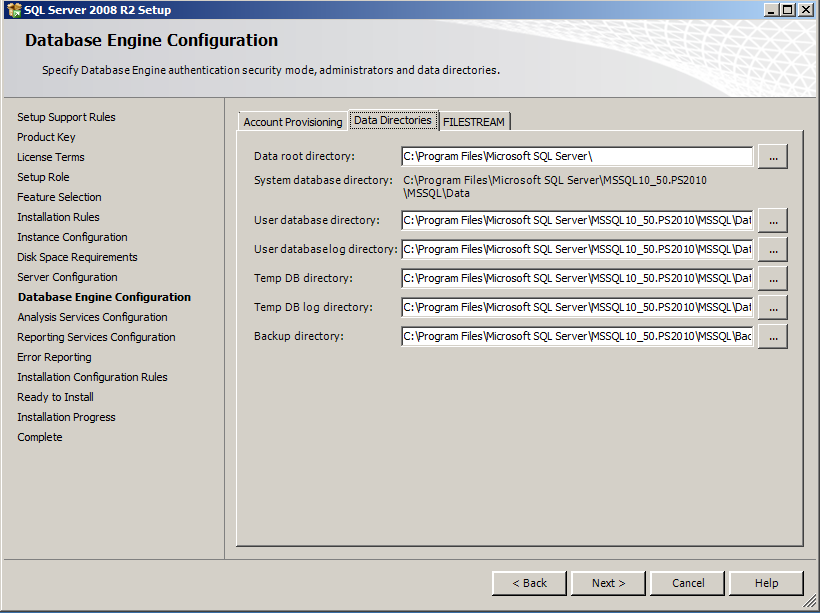
4.On the Specify Configuration Database Settings page, do the following:
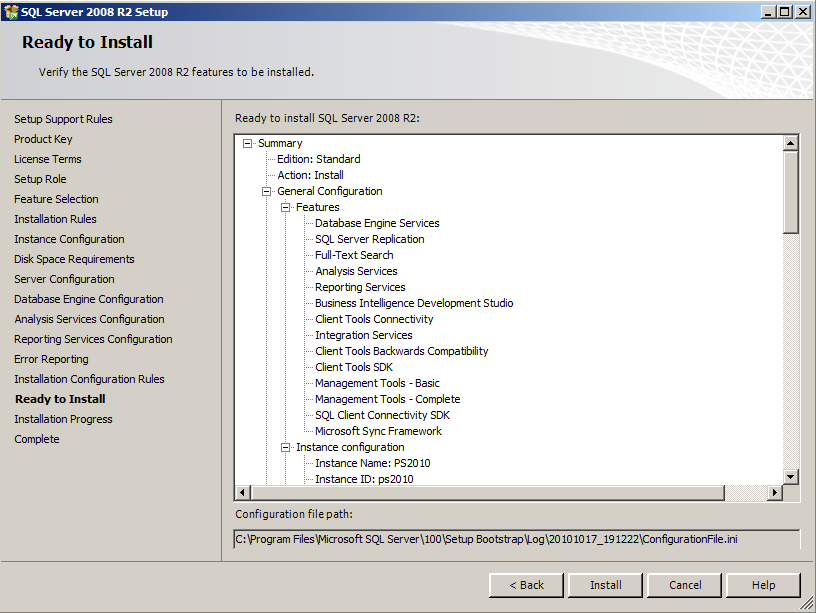
                     In the Database server box, type the name of the computer that is running SQL Server.


                     In the Database name box, type a name for your configuration database or use the default database name. The default name is SharePoint_Config.


                     In the Username box, type the user name of the server farm account. Ensure that you type the user name in the format DOMAIN\user name.


05_sharepoint_2010_config_db_settings

Note: The server farm account is used to create and access your configuration database. It also acts as the application pool identity account for the SharePoint Central Administration application pool, and it is the account under which the Microsoft SharePoint Foundation Workflow Timer service runs. The SharePoint Products Configuration Wizard adds this account to the SQL Server Login accounts, the SQL Server dbcreator server role, and the SQL Server securityadmin server role. The user account that you specify as the service account must be a domain user account, but it does not need to be a member of any specific security group on your front-end Web servers or your database servers. We recommend that you follow the principle of least privilege and specify a user account that is not a member of the Administrators group on your front-end Web servers or your database servers.

                     In the Password box, type the user password.


5.Click Next.

6.On the Specify Farm Security Settings page, type a passphrase, and then click Next.
Ensure that the passphrase meets the following criteria:

06_sharepoint_2010_farm_security_settings


7.On the Configure SharePoint Central Administration Web Application page, do the following:

                     Either select the Specify port number check box and type the port number you want the SharePoint Central Administration Web application to use, or leave the Specify port number check box cleared if you want to use the default port number.


                     Click either NTLM or Negotiate (Kerberos).


07_sharepoint_2010_ca_configuration

8.Click Next.

9.On the Completing the SharePoint Products Configuration Wizard page, review your configuration settings to verify that they are correct, and then click Next.

08_sharepoint_2010_completing

09_sharepoint_2010_configuring_process

10_sharepoint_2010_configuration_successful

13.         On the Configuration Successful page, click Finish.

Note: If the SharePoint Products Configuration Wizard fails, check the PSCDiagnostics log files, which are located on the drive on which SharePoint Server is installed, in the %COMMONPROGRAMFILES%\Microsoft Shared\Web Server Extensions\14\LOGS folder.

Configure browser settings

After you run the SharePoint Products Configuration Wizard, you should ensure that SharePoint Server works properly for local administrators in your environment by configuring additional settings in Internet Explorer.

If you are prompted for your user name and password, perform the following procedures:

   Add the SharePoint Central Administration Web site to the list of trusted sites


   Disable Internet Explorer Enhanced Security settings


   Configure Proxy Settings

To add the Central Administration Web site to the list of trusted sites

1.In Internet Explorer, on the Tools menu, click Internet Options.

2.On the Security tab, in the Select a zone to view or change security settings area, click Trusted Sites, and then click Sites.

12_sharepoint_2010_ie_trusted_sites

3.Clear the Require server verification (https:) for all sites in this zone check box.

4.In the Add this Web site to the zone box, type the URL to your site, and then click Add.

5.Click Close to close the Trusted Sites dialog box.

6.Click OK to close the Internet Options dialog box.

To disable Internet Explorer Enhanced Security settings

1.Click Start, point to All Programs, point to Administrative Tools, and then click Server Manager.

2.In Server Manager, select the root of Server Manager.

3.In the Security Information section, click Configure IE ESC.
The Internet Explorer Enhanced Security Configuration dialog box opens.

13_sharepoint_2010_ie_trusted_sites

4.In the Administrators section, click Off to disable the Internet Explorer Enhanced Security settings, and then click OK.

To configure proxy server settings to bypass the proxy server for local addresses

1.In Internet Explorer, on the Tools menu, click Internet Options.

2.On the Connections tab, in the Local Area Network (LAN) settings area, click LAN Settings.

3.In the Automatic configuration area, clear the Automatically detect settings check box.

4.In the Proxy Server area, select the Use a proxy server for your LAN check box.

5.Type the address of the proxy server in the Address box.

6.Type the port number of the proxy server in the Port box.

7.Select the Bypass proxy server for local addresses check box.

8.Click OK to close the Local Area Network (LAN) Settings dialog box.

9.Click OK to close the Internet Options dialog box.

Run the Farm Configuration Wizard

You have now completed Setup and the initial configuration of SharePoint Server 2010. You have created the SharePoint Central Administration Web site. You can now create your farm and sites, and you can select services by using the Farm Configuration Wizard.

To run the Farm Configuration Wizard

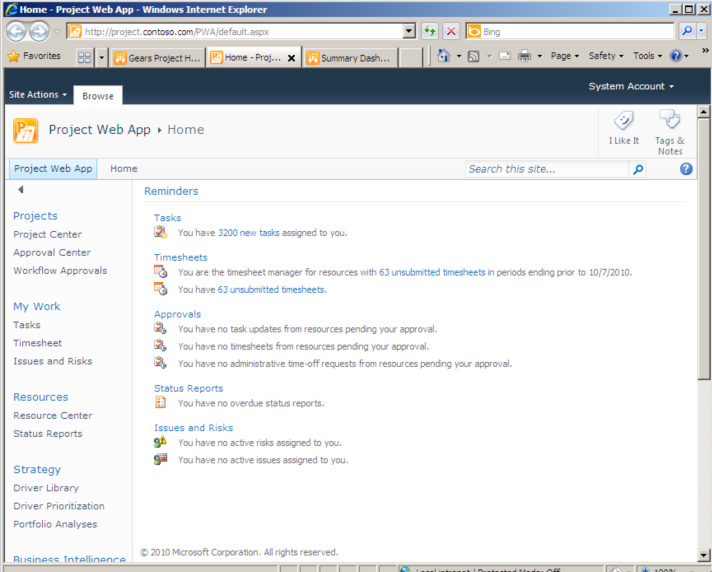
1.On the SharePoint Central Administration Home page, under Quick Launch, click Configuration Wizards, and then click Launch the Farm Configuration Wizard.

2.On the Help Make SharePoint Better page, click one of the following options, and then click OK:

14_sharepoint_2010_configure_farm

                     Yes, I am willing to participate (Recommended.)

                     No, I don’t want to participate.

3.On the Configure your SharePoint farm page, click Walk me through the settings using this wizard, and then click Next.

4.On the Configure your SharePoint farm page, in the Service Account section, click the service account option that you want to use to configure your services.

16_sharepoint_2010_configure_service_accts

  Note: For security reasons, we recommend that you use a different account from the farm administrator account to configure services in the farm.
If you decide to use an existing managed account — that is, an account that SharePoint Server is aware of — ensure that you click that option before you continue

8.Select the services that you want to use in the farm, and then click Next.

15_sharepoint_2010_configure_services_1

12.         On the Create Site Collection page, do the following:

                     In the Title and Description section, in the Title box, type the name of your new site.


                     Optional: In the Description box, type a description of what the site contains.


                     In the Web Site Address section, select a URL path for the site.


                     In the Template Selection section, in the Select a template list, select the template that you want to use for the top-level site in the site collection.


18_sharepoint_2010_create_collection_site   

13.         Click OK.

14.         On the Configure your SharePoint farm page, review the summary of the farm configuration, and then click Finish.

Monday, October 25, 2010

Building a single server Project Server 2010 with SQL Server for use as a development environment. Part 2

Install SharePoint Server 2010

To install and configure SharePoint Server 2010, follow these steps:
1.Run the Microsoft SharePoint Products Preparation Tool, which installs all required prerequisites to use SharePoint Server.
2.Run Setup, which installs binaries, configures security permissions, and edits registry settings for SharePoint Server 2010.
3.Run SharePoint Products Configuration Wizard, which installs and configures the configuration database, the content database, and installs the SharePoint Central Administration Web site.
4.Configure browser settings.
5.Run the Farm Configuration Wizard, which configures the farm, creates the first site collection, and selects the services that you want to use in the farm.
6.Perform post-installation steps.

Important:
·       To complete the following procedures, you must be a member of the Administrators group on the local computer.
·       Because the prerequisite installer downloads components from the Microsoft Download Center, you must have Internet access on the computer on which you are installing SharePoint Server.

Run the Microsoft SharePoint Products Preparation Tool
Use the following procedure to install software prerequisites for SharePoint Server 2010.

To run the Microsoft SharePoint Products Preparation Tool
1.Insert your SharePoint Server 2010 installation disc.

sharepoint_2010_autoplay.gif

2.On the SharePoint Server 2010 Start page, click Install software prerequisite

sharepoint_2010_splash_page.gif

3.On the Welcome to the Microsoft SharePoint Products Preparation Tool page, click Next.

sharepoint_2010_welcome_screen.gif

4.On the License Terms for software product page, review the terms, select the I accept the terms of the License Agreement(s) check box, and then click Next.

sharepoint_2010_license_terms.gif

5.On the Installation Complete page, click Finish.

sharepoint_2010_installation_complete.gif


Run Setup

The following procedure installs binaries, configures security permissions, and edits registry settings for SharePoint Server 2010. At the end of Setup, you can choose to start the SharePoint Products Configuration Wizard, which is described later in this section.

To run Setup

1.On the SharePoint Server 2010 Start page, click Install SharePoint Server.

sharepoint_2010_splash_page 2.gif

2.On the Enter Your Product Key page, enter your product key, and then click Continue.

image012.png

3.On the Read the Microsoft Software License Terms page, review the terms, select the I accept the terms of this agreement check box, and then click Continue.

sharepoint_2010_license_terms 2.gif


4.On the Choose the installation you want page, click Server farm.

sharepoint_2010_server_farm.gif

5.On the Server Type tab, click Complete.
sharepoint_2010_server_type


6.Optional: To install SharePoint Server 2010 at a custom location, click the File Location tab, and then either type the location or click Browse to find the location.

sharepoint_2010_files_location.gif

7.Click Install Now.

sharepoint_2010_installation_progress.gif

8.When Setup finishes, a dialog box prompts you to complete the configuration of your server. Ensure that the Run the SharePoint Products and Technologies Configuration Wizard now check box is selected.

sharepoint_2010_run_wizard.gif

9.Click Close to start the configuration wizard.

Note: check log files in the Temp folder of the user who ran Setup. Ensure that you are logged in as the user who ran Setup, and then type %temp% in the location bar in Windows Explorer. If the path in Windows Explorer resolves to a location that ends in a "1" or "2", you will need to navigate up one level to view the log files. The log file name is SharePoint Server Setup (<timestamp>).

Monday, October 18, 2010

Building a single server Project Server 2010 with SQL Server for use as a development environment. Part 1

Part 1 Setting up SQL Server for a Project Server 2010

This article describes how to install and configure Microsoft SQL Server 2008 R2 for use with Project Server 2010. Project Server 2010 requires one of the following versions of SQL Server:
   Microsoft SQL Server 2008 with Service Pack 1 (SP1) and Cumulative Update 2
   Microsoft SQL Server 2008 R2

   Microsoft SQL Server 2005 SP3 with Cumulative update package 3 for SQL Server 2005 Service Pack 3

This article describes installing and configuring SQL Server 2008 R2. 

Configure a local administrator
It is recommended to install SQL Server 2008 R2 while logged on with the SQL Server administrator domain account (SDRED\Developer). Prior to doing this, you must add this account to the local Administrators group on the virtual machine.
Log on to the virtual machine with the domain administrator account (SDRED\Administrator) and perform the following procedure to add the SDRED\Developer account to the local Administrators group.
To add a local administrator
1.Log on to the virtual machine where you want to install SQL Server as a domain administrator.
2.Click Start, click Administrative tools, and then click Computer Management.
3.Expand Local Users and Groups, and then click Groups.
4.In the right pane, right-click Administrators, and then click Properties.
5.Click Add.
6.Type the name of the SQL Server administrator account (SDRED\Developer), and then click OK.
7.Click OK.
8.Log off the virtual machine.
To perform the remaining procedures in this article, log on to virtual machine with the SDRED\Developer account.
Install SQL Server 2008
Perform the following procedure to install SQL Server 2008 R2 on the virtual machine.
To install SQL Server 2008
1.Attach the SQL Server 2008 R2 DVD or image file to the virtual machine DVD drive.
2.Log on to the virtual machine where you want to install SQL Server as the SQL Server administrator.
3.On the SQL Server DVD, double-click setup.exe
sql_server_2008_r2_autoplay

4. The first step is to install SQL Server 2008 R2. SQL Server 2008 R2 requires the NET Framework version 3.5. If the .NET Framework 3.5 is currently not installed, you must install it or enable it as a feature in Windows Server 2008 before you continue.sql_server_2008_r2_setup_dotnet
5.If a compatibility warning is displayed, click Run program.
6. In the SQL Server Installation Center, in the left pane, click Installation.
sql_server_2008_r2_installation_center
7.In the right pane, click New SQL Server stand-alone installation or add features to an existing installation.
8.If a compatibility warning is displayed, click Run program.
9.On the Setup Support Rules page, click OK.
sql_server_2008_r2_setup_support_rules
10.         On the Product Key page, type your product key, and then click Next.
sql_server_2008_r2_product_key
11.         On the License Terms page, review the license agreement and, if you agree, select the I accept the license terms check box, and then click Next.
sql_server_2008_r2_license_terms
12.         On the Setup Support Files page, click Install.
sql_server_2008_r2_setup_support_files
13.         On the Setup Support Rules page, click Next.
sql_server_2008_r2_setup_support_rules2
14.         On the Setup Role click on the SQL Server Feature Installation.
sql_server_2008_r2_setup_role
15.         On the Feature Selection page, select the following check boxes:
                     Database Engine Services
                     Analysis Services
                     Reporting Services
                     Management Tools - Complete
sql_server_2008_r2_feature_selection
16.         Click Next.
17.         On the Installation Rules Click Next.
sql_server_2008_r2_installation_rules
18.         On the Instance Configuration page, leave the Default instance option selected or name your own instance, and then click Next. (Because this development VM will be supporting various production environments I prefer to have an instance for each production environment I’ll be supporting)
sql_server_2008_r2_instance_configuration
19.         On the Disk Space Requirements page, click Next.
sql_server_2008_r2_disk_space_requirements
20.         On the Database Engine Configuration page, select the Mixed Mode option, and type and confirm a password for the built-in SQL Server administrator account.
sql_server_2008_r2_database_engine_configuration
21.         Click Add Current User to add the current user account as a SQL Server administrator.
22.         On the Data Directories Tab, enter the database directories or leave the defaults
sql_server_2008_r2_database_engine_configuration_directories
23.         Click Next.
24.         On the Analysis Services Configuration page, click Add Current User to add the current user account as an Analysis Services administrator.
sql_server_2008_r2_analysis_services_configuration
25.         Click Next.
26.         On the Reporting Services Configuration page, select the Install the SharePoint integrated mode default configuration option, and then click Next.
sql_server_2008_r2_reporting_services_configuration
27.         On the Error and Usage Reporting page, leave the default values and then click Next.
sql_server_2008_r2_error_reporting
28.         On the Installation Rules page, click Next.
sql_server_2008_r2_installation_rules
29.         On the Ready to Install page, click Install.
sql_server_2008_r2_ready_to_install
30.         When the setup process is complete, click Next.
On the Complete page, click Close.
sql_server_2008_r2_complete

Monday, October 11, 2010

Microsoft Project 2010 Demonstration and Evaluation Installation Pack on VMware with a Bridged Network Adaptor


If you have installed the 2010 Information Worker Demonstration and Evaluation Virtual Machine on VMware and want to add the Project 2010 Demonstration and Evaluation Pack.  The installation wizard is simple to follow and generally works well.

There are two things you must due to ensure the installation goes well.  First thing is that you must activate the VM or you may get an ‘Unexpected Error’.

The instructions recommend installing a second network adaptor but what I did was simply to add an alternate DNS to the existing one. It appeared to me that the only purpose of the second adaptor was for the outbound HTTP traffic during the activation of the VM, therefore simply adding one of my Internet Providers external DNS was sufficient for this purpose. You can find your own provider’s DNS from the configuration settings of your router.

The second thing to keep in mind is the network configuration.  The Information Worker VM is configured with an Internal Virtual Network and expects the address of the DEMO2010A VM to be 192.168.150.1


01contoso_ip_settings.png

I like to set my network in Bridged (Autodetect) mode to more closely resemble my production environment and therefore required modifications to the DNS of the DEMO2010-a VM
If you notice right after the installation of the Information Worker VM the Forward Lookup Zones have the entries for the DEMO2010-a and DEMO2010-b as 192.168.150.1 and 192.168.150.2.

02reverse_lookup_zones.png

You will find corresponding entries in the GC records on the DNS.

03contoso_gc_properties.png

Since I had modified the IP settings of both VMs machines I need to update the GC, Forward Lookup and Backward Lookup Zones accordingly.
After downloading  the Project2010\Project2010DemoPack.iso and mounting the volume you will have the following files. Copy them into a temporary folder.

04project2010_demo_pack.png

Mount the Project2010DemoPack disk image and the run the Projct2010DemoPack in the AutoPlay dialog window.

05project2010_demo_pack_installation_wizard.png

Click on the Install button in the Welcome Screen.

06project 2010_demonstration_installer_pack.png

Allow it to unpack and execute the installation.

07project 2010_demonstration_installation.png

The PowerShell of the installation wizard will use the entries in the DNS to set up the projct.contoso.com/pwa

09project_2010_on_192_68_150_1.png

If you did not update your GC, Forward Lookup and Backward Lookup records to your Bridged IP addresses then the installation wizard will fail when it tries to connect to project.contoso.com/PWA because it will be looking for it in the 192.168.150.1 address.

08unable_to_connect_to_project_2010.png

and when you try to connect to PWA you will not be able to find the page

10project_2010_contoso_cannot_display_webpage.png

When this happens simple update your DNS entries with the IP addresses of the machine.  I have set up both of my DEMO2010 VMs to have static addresses

14demo2010a_ip_settings_bridge_only.png

I removed the GC records and added the new ones with the designated IP addresses.

12project_2010_dns_gc_record.png

You need to also update the ForwardLookup and Reverse Lookup Zones in the DNS

13project_2010_dns_reverse_lookup_zones.png

After making these updates to the DNS I ran the installation wizard again and the  Project Server 2010 PWA Home Page came up right this time.

11project_2010_contoso_default_page.png

For additional SharePoint and Project Server related articles visit my website at